SPACEto play / pauseARROW RIGHTorLto go forwardARROW LEFTorJto go backwardARROW UPto increase volumeARROW DOWNto decrease volumeFto toggle fullscreenMto toggle mute0 to 9to go to the corresponding part of the videoSHIFT+,to decrease playback speedSHIFT+.or;to increase playback speed
Bruno’s TSL journey
WebGPU
- Compatibility (CanIUse)
TSL
TSL credits
- Sunag
- mrdoob
- Mugen87
- WestLangley
- RenaudRohlinger
- Makio64
- cmhhelgeson
- Spiri0
- gkjohnson
- LeviPesin
- Contributors page
Others
Shortcuts ⌨️
Unlock content 🔓
To get access to 93 hours of video, a members-only Discord server, subtitles, lesson resources, future updates and much more join us for only $95!
Want to learn more? 👋
That's the end of the free part of this lesson
WebGPU & TSL Course
new
$45
VAT incl.
- 21 lessons · 24 hours of video
- Quizzes · Certificate
- Members-only Discord server · Future updates
WebGPU & TSL
Chapter 01 — Fundamentals
01. Introduction to WebGPU and TSL
Introduction 00:00
Welcome to the Three.js Journey TSL / WebGPU course.
The lessons you are about to discover are in direct continuity with the original Three.js Journey lessons. Previously, we learned all the fundamentals of Three.js, and even more. In this course, we focus on this brand new Three.js feature called TSL.
If you are here, you probably have an idea of what WebGPU and TSL are, but let’s make sure that everyone is on the same page. We’ll go through a bit of theory, but don’t worry, it’s a short lesson, and we get to practice at the end by setting up a Three.js project and making it run WebGPU.
This lesson is also a chance to give you a glimpse of the upcoming lessons and how the course is organized.
WebGPU 00:37
WebGPU is the “new” JavaScript API to utilize the GPU in the browser.
I’m saying “new” in quotes because it has been around for a while. Its development started in 2017.
WebGPU is considered the successor to WebGL, but why does WebGL even need a successor? WebGL was based on that good old OpenGL, but technologies and usage have changed, and WebGL wasn’t able to follow that evolution. Version 2, which arrived in 2017, was welcomed and brought interesting features, but it was time for a clean slate.
WebGPU enables many features and optimizations. You can have multiple contexts on the same page without worrying too much about performance. We have access to GPGPU (general-purpose computing on graphics processing units) features without resorting to weird data-as-pixel tricks. There’s improved state management, new types of buffers, and many more fancy and complex features. And the cool part is that most of those features are handled by Three.js, so we benefit from them without doing anything.
Even better, most devices and browsers already support WebGPU: https://caniuse.com/webgpu
Unfortunately, there is a catch. WebGPU comes with a new shader language called WGSL. And if you remember how hard it was to learn GLSL, you might be worried. And that’s where TSL comes in.
TSL 02:42
TSL stands for Three.js Shading Language.
In short, TSL is an easier way to write shaders using JavaScript. And it came out as the perfect solution to support both WebGL and WebGPU:
- If the user doesn’t support WebGPU, Three.js will run the “WebGL backend”, and shaders written in TSL will be compiled to GLSL.
- If the user supports WebGPU, Three.js will run the “WebGPU backend”, and shaders written in TSL will be compiled to WGSL.
We don’t have to write any GLSL or WGSL; we just write TSL shaders.
Since it’s JavaScript, it’s a lot easier than learning a new language like WGSL. Even though it’s big, TSL has been built to be beginner friendly and permissive, thanks to a node-based approach that we’ll learn together.
TSL comes with a bunch of benefits:
- The nodes system is ideal to enhance existing shaders
- It makes it easier to re-use pieces of shaders
- It’s easier to maintain, which is great for us developers, but also for the developers working on Three.js
- It has better tree-shaking
- It’s future-proof
If you’re reluctant to use TSL, give it a try. It’s the kind of thing you really enjoy once you get used to it. Just remember how painful your first experience was with Blender, and now you love it. Don’t you?
And if you think that your GLSL knowledge is wasted, it’s not. Most of the techniques you’ve learned work just the same. Even better, you’ll have a better understanding of what’s going on in your shader, and you’ll be able to optimize it better than anyone else.
Before and after 05:20
I’ve been teasing you for long enough. How about I show you what this is all about with a “before” and “after” comparison?
Have a look at the TSL version and try to understand what’s going on. You’ll be surprised by how comprehensible it is.
Displaying the UV
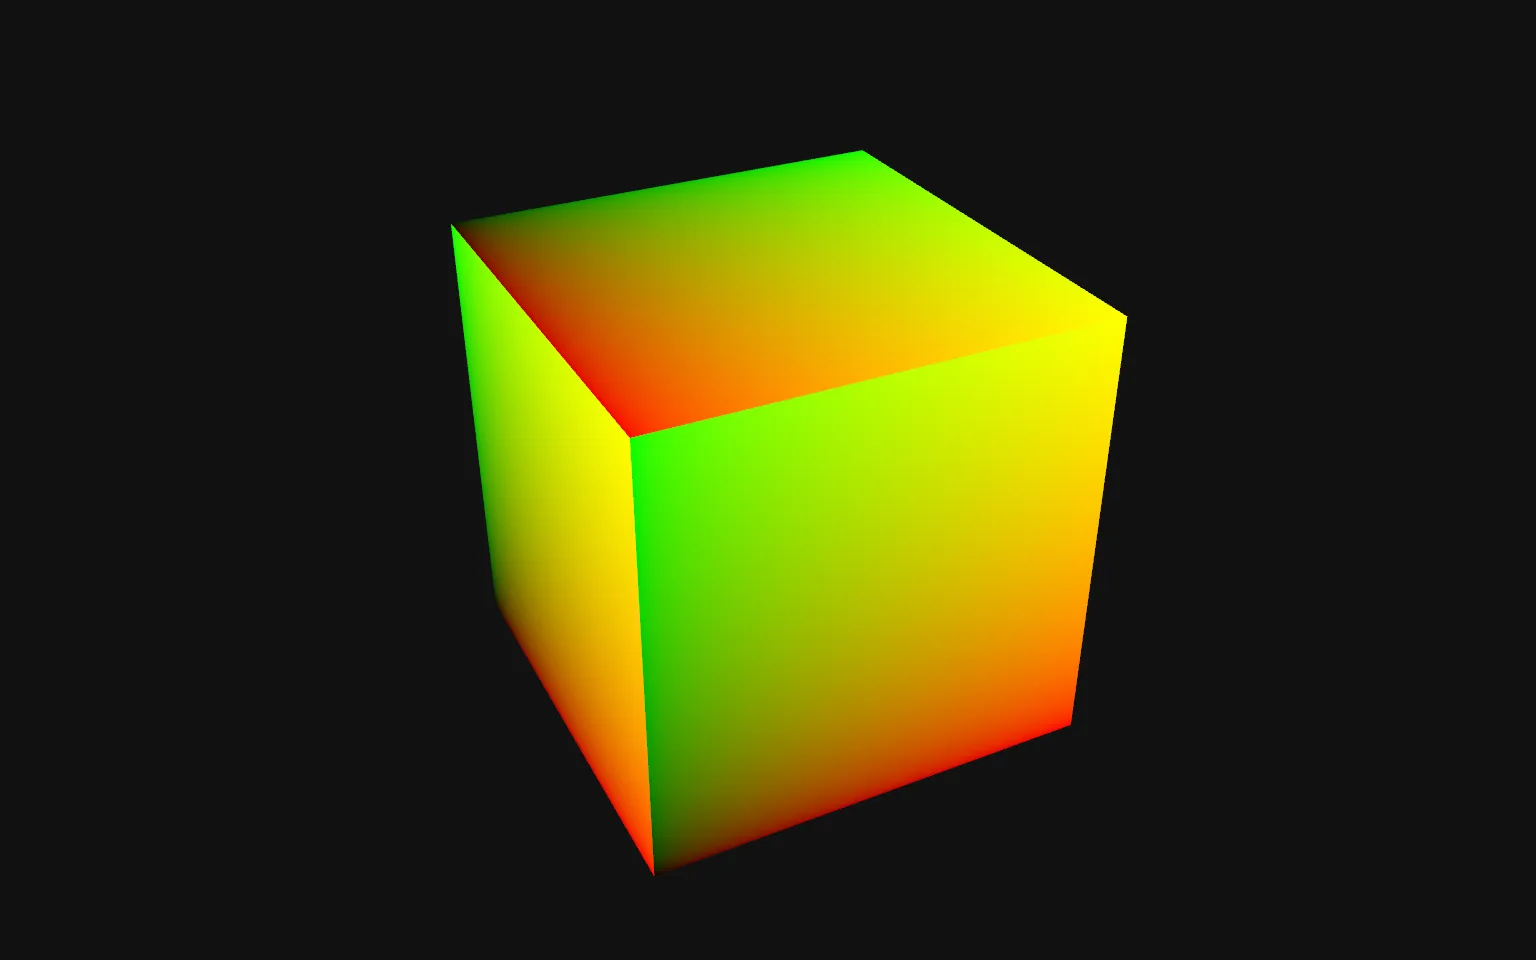
Before:
const material = new THREE.ShaderMaterial({
    vertexShader: `
        varying vec2 vUv;
        void main()
        {
            vUv = uv;
            gl_Position = projectionMatrix * modelViewMatrix * vec4(position, 1.0);
        }
    `,
    fragmentShader: `
        varying vec2 vUv;
        void main()
        {
            gl_FragColor = vec4(
                vUv.x, vUv.y, 0.0, 1.0
            );
        }
    `
})
After:
const material = new THREE.MeshBasicNodeMaterial()
material.colorNode = vec3(uv(), 0)- Only 2 lines of code
- No vertex shader
- No varying
- No need to add the
.0for the floats - No need to provide the default shader instructions
For the visual learners, here’s what it looks like with graphical nodes:
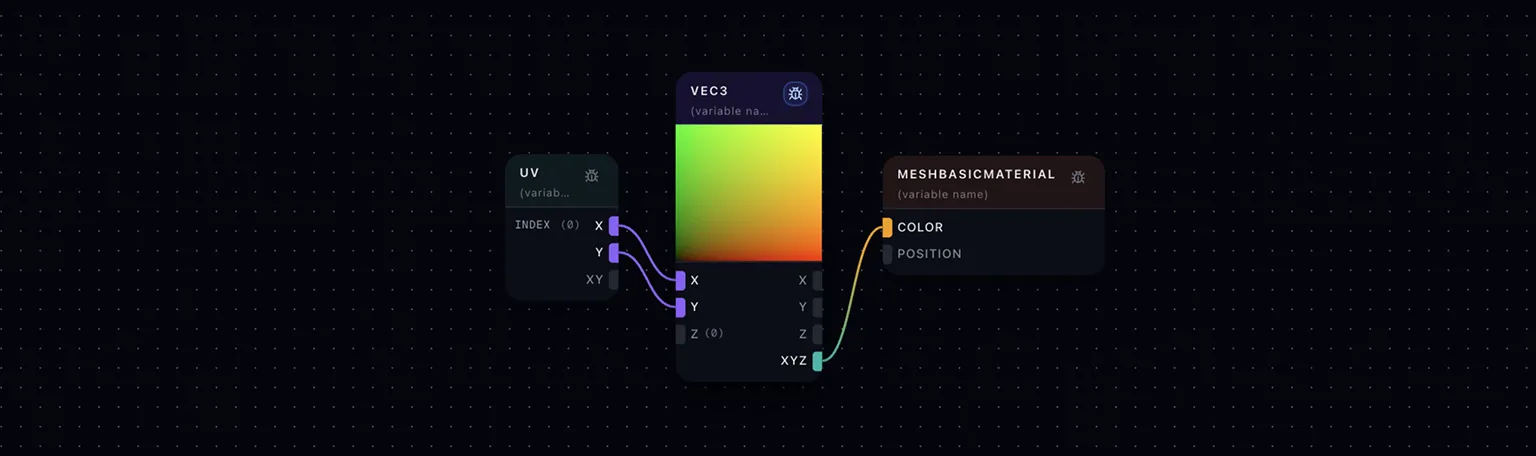
☝️
More about this tool to visualize TSL as graph in the next lesson.
Fresnel
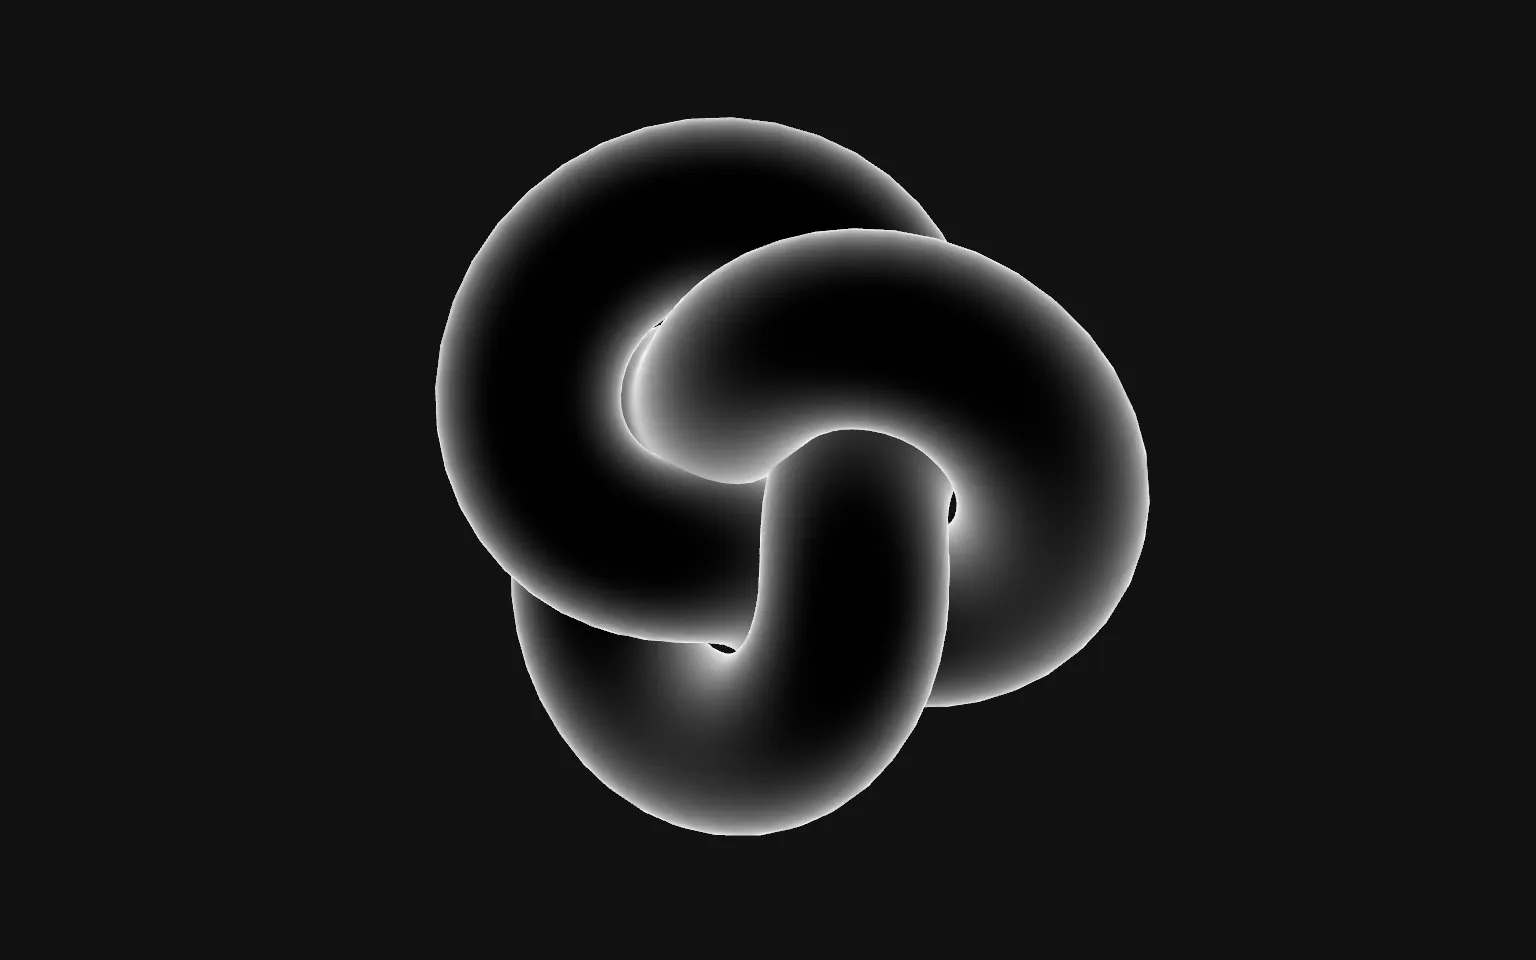
Before:
const material = new THREE.ShaderMaterial({
    vertexShader: `
        varying vec3 vNormal;
        varying vec3 vViewDirection;
        void main()
        {
            vNormal = normalize(normalMatrix * normal);
            vec4 modelViewPosition = modelViewMatrix * vec4(position, 1.0);
            vViewDirection = normalize(- modelViewPosition.xyz);
            gl_Position = projectionMatrix * modelViewPosition;
        }
    `,
    fragmentShader: `
        varying vec3 vNormal;
        varying vec3 vViewDirection;
        void main()
        {
            float fresnel = pow(
                1.0 - dot(vNormal, vViewDirection),
                3.0
            );
            gl_FragColor = vec4(fresnel, fresnel, fresnel, 1.0);
        }
    `
})
After:
const material = new MeshBasicNodeMaterial()

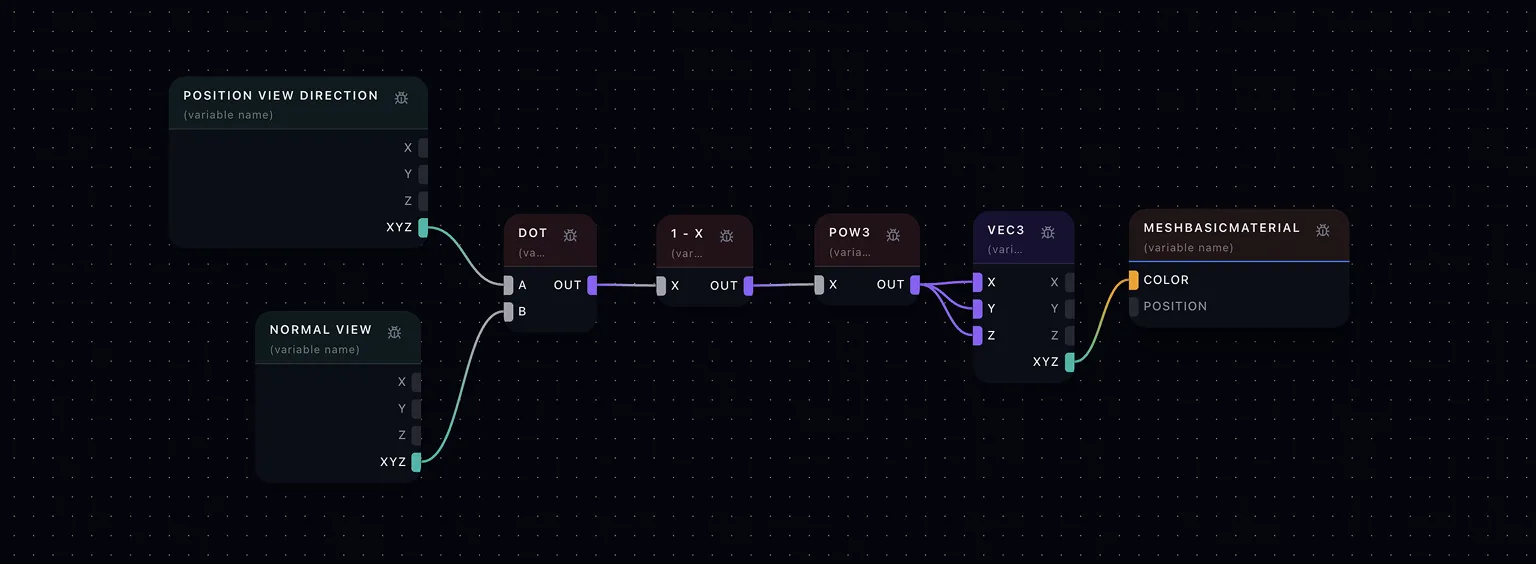
const fresnel = dot(positionViewDirection, normalView).oneMinus().pow(3)
material.colorNode = vec3(fresnel)- Only 3 lines of code
- Still no vertex shader
- Still no varying
- The
fresnelvalue seems to go through a succession of nodes - We didn’t even have to write what’s in
positionViewDirectionandnormalView
For the visual learners:
Animated wobble
Before:
const material = new THREE.ShaderMaterial({
    uniforms:
    {
        uTime: { value: 0 }
    },
    vertexShader: `
        uniform float uTime;

        void main()
        {
            vec4 worldPosition = modelMatrix * vec4(position, 1.0);

            float wave = sin(uTime + worldPosition.y) * 0.15;
            vec3 newPosition = position + normal * wave;

            gl_Position = projectionMatrix * modelViewMatrix * vec4(newPosition, 1.0);
        }
    `,
    fragmentShader: `
        // ...
    `
})

// In the render loop
material.uniforms.uTime.value = timer.getElapsed()
After:
const material = new MeshBasicNodeMaterial()
const wave = time.add(positionWorld.y).sin().mul(0.15)
material.positionNode = positionLocal.add(normalLocal.mul(wave))- Only 3 lines of code again
- More variables like
time,positionWorld,positionLocal, andnormalLocal, which seem to hold exactly what we need
For the visual learners:
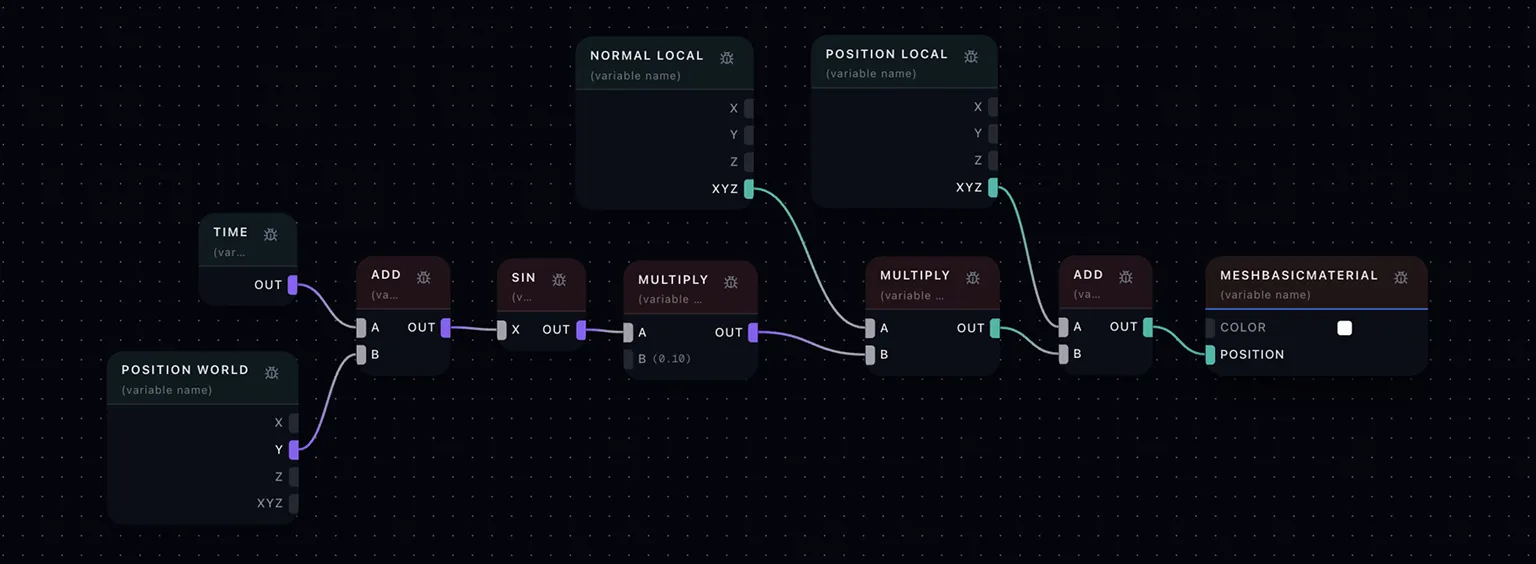
You must have many questions, and want to jump in immediately, but we need to learn a few things first.
Downsides 09:49
As much as I love TSL and everything it brings, there are a few downsides worth mentioning.
You need to learn it
Yes, it’s easy and permissive, but there is so much to it. It opens many doors, but you need to learn about those doors, what they imply, and how to go through them the right way.
But that’s what you’re here for, and I got you covered.
Syntax
This node syntax is not to everyone’s taste.
Personally, I love it. I visualize the nodes like the graphic nodes we can find in Blender, Unreal Engine, or Unity. I’ll show you a tool to build TSL using an actual graph in the next lesson, and you already saw a preview earlier.
If you are reluctant, I’d recommend you keep digging. Once you get the hang of it, you can’t let it go.
Abstraction layer
It’s so easy that we tend to make mistakes without even noticing, especially because of the abstraction layer TSL creates.
And that’s where your GLSL knowledge will come in handy. You’ll know that this code should be executed in the vertex shader, that this function implies many instructions, or that it’s better to just sample a texture than to use a procedural function.
Three.js only
Remember that the T in TSL stands for “Three.js”. You won’t be able to use your TSL shaders with other libraries, and vice versa. At least for now.
It’s evolving
Even though TSL has been around for a while now, it keeps evolving. The developers come up with new ideas, and they take all feedback seriously. And this is great! But it also means that some of our code and knowledge might get outdated at some point.
Don’t worry, the library is very stable now. More and more projects are relying on TSL, and issues are infrequent. We shouldn’t expect big changes. But keep an eye on the Three.js releases, and be prepared to have some work to do if you update the library.
As for me, I’ll do my best to keep the lessons up to date.
Credits 12:23
As you can imagine, TSL is huge, and supporting WebGPU required colossal changes to the library that took years. And this was made possible by all the people who worked on it.
Here’s the list of developers who specifically worked on this part of the Three.js library. I’ve linked their GitHub pages, and some of them have active sponsorship, so don’t hesitate to support them if you appreciate their work.
- mrdoob (creator of Three.js)
- Sunag (lead on the WebGPU and TSL update, and who helped me a lot when learning TSL)
- Mugen87 (lead maintainer of Three.js)
- WestLangley
- RenaudRohlinger
- Makio64
- cmhhelgeson
- Spiri0
- gkjohnson
- LeviPesin
And obviously all the other developers who work on the library, and who you can find on the Contributors page.
The lessons 13:42
I put all my heart and energy into this course. My objective was to create the most advanced and complete course you could get. For that, I spent more than a year learning and practicing TSL. My main project was my portfolio, and you can discover the whole process on my YouTube channel.
In addition, I recreated all the original Three.js Journey shader lessons in TSL.
And also a bunch of projects just for fun.
In the following lessons, we’ll cover as many features as possible. It’s the same format as in the original course.
Lessons are available in both video and text, and the content is the same, minus the french accent in the text.
If you follow the video, whenever I refer to a link, you can find it in the Lesson’s link tab at the bottom right corner of the lesson page.
A starter file is provided with each lesson. Download it, unzip it, and use whatever code editor you like. We are going to do that together in a moment. You can also find the result of the exercise as the final file, and whenever there are additional files such as Blender models, Photoshop textures, or any other work file, I provide them in the resources file.
The whole course is very practice-oriented. As for the pre-requisites, you don’t need to be a Three.js nor shader expert. Basic knowledge will do the trick. Same goes for mathematics. Even if you don’t know much about matrices, vectors, or trigonometry, you should be fine and I always take some time to explain the formulas.
The course is split into 2 chapters.
The Fundamentals chapter is oriented toward understanding the basics of TSL. We discover the many aspects, features, and tricks through practical exercises. The goal is to cover as much knowledge as possible, without getting too bored.
The Advanced Projects chapter is the real deal. We put all the knowledge from the Fundamentals chapter into actual projects. This is where we consolidate what we’ve learned so far and start to have fun. The first projects are remakes of lessons from the original course to practice in a familiar environment, but we quickly switch to brand new experiments. And since TSL allows us to get things done faster, be prepared to dive into very advanced techniques.
Here are previews of the Advanced Projects lessons.
Patterns
This one is similar to the old Shaders patterns lesson, but with TSL. It’s the opportunity to focus only on the fragment stage to keep things simple.
We quickly go over iconic patterns, learn new ones, and create a little pond with just a few lines of TSL.
Coffee smoke
Another lesson in which we re-do an old exercise and create animated smoke coming out of a coffee mug. In this one, we get to play with vertex positioning and cool procedural functions.
Post Processing
Post processing got a makeover with TSL, and it’s better than ever. This lesson comes early because I wanted the rest of the lessons to look good. We get to implement classic effects, but also create our own. We start with the same drunk effect we did in the initial Post Processing lesson, and then build a very cool shattered screen effect.
Shield
Hexagons are the Bestagons. Ever heard of this expression?
In this lesson, we create a shield made of hexagons, mostly relying on fragment tricks. And we implement impacts that the nearby hexagons react to.
Instances
Thanks to TSL, instancing became a lot more accessible, which opens the door to many features and optimizations. But to use instancing the right way, we need to understand what’s going on and how to manipulate the data used by those instances. It’s not a particularly fun lesson, but it’s full of knowledge that we put into practice right after.
Magic Explosions
And what’s better than cool magic explosions to practice instancing?
More than just drawing a few dozen explosions, we also learn a trick to render only the right number of them on screen.
Sprites
Points? Particles? Sprites? Are those the same thing? It’s time to clarify the terms and see how Three.js now handles… particles?
Galaxy
And we put the Sprites lesson knowledge into practice to create a cool galaxy, very similar to the Galaxy we built in the original lessons, but this time with a different approach and style.
Anvil
Have you heard of compute shaders? If not, you’re going to love them. In this lesson, we create sparkles popping out at the impact between the hammer and the anvil, and make those sparkles bounce on the floor realistically. And as a bonus, we also make the blade glow from the heat.
Clair Obscur Title
Video games have always been a huge inspiration for me, and Clair Obscur is no exception. In this lesson, we create an improved version of the title screen with petals spawning around the cursor and moving in the wind.
Sphere Particles Physics
And we continue with compute, this time to run a physics simulation on the GPU, with thousands of spheres colliding with each other, and creating heat on impact, so much that they start to glow.
Don’t worry, it’s just a render. It’s not actual heat. Well, maybe your computer is going to heat up a little bit.
Stylized Nature Scene
Stylized Nature is one of my favorite styles of environment, and it’s such a good way to practice. This lesson is a compilation of advanced techniques, and we get to create grass moving in the wind, and water with depth effects. Even better, we compute our own normal! You don’t know what it means? Well, you will.
Snow
This one is a classic we find in video games. Who can resist drawing hearts and circles in the snow? Because that’s what you would draw, right?
The technique we use is very robust, and any object moving on the snow leaves a very precise track.
Resources 28:07
Here are some more tools and resources we’ll refer to during the lessons. Ideally, keep them somewhere handy.
Three.js documentation
The official Three.js documentation is up to date, and it includes all the nodes.
Having all those classes and nodes laid out as a single flat list isn’t very convenient, which is why we usually refer to it when we have a very specific node to check.
Tour of TSL & Wiki
In addition to the official documentation, there are two main official sources:
The Wiki is a huge page listing the many nodes, explaining some technical aspects of the library, and its origin.
Tour of TSL is an interactive introduction to TSL with a bunch of useful features to help you doodle with nodes.
The Tour of TSL will become the main source of information for TSL, and it should replace the Wiki, but as I’m writing this lesson, it’s still in development.
For this reason, I’ll still refer to the Wiki in the following lessons, but I’ll provide the Tour of TSL links too whenever it’s ready.
Three.js examples
And obviously, the examples have been updated too with a bunch of TSL demonstrations.
As of right now, old WebGL examples and new WebGPU examples coexist on the same page, and you can distinguish them with this little WebGPU section title:
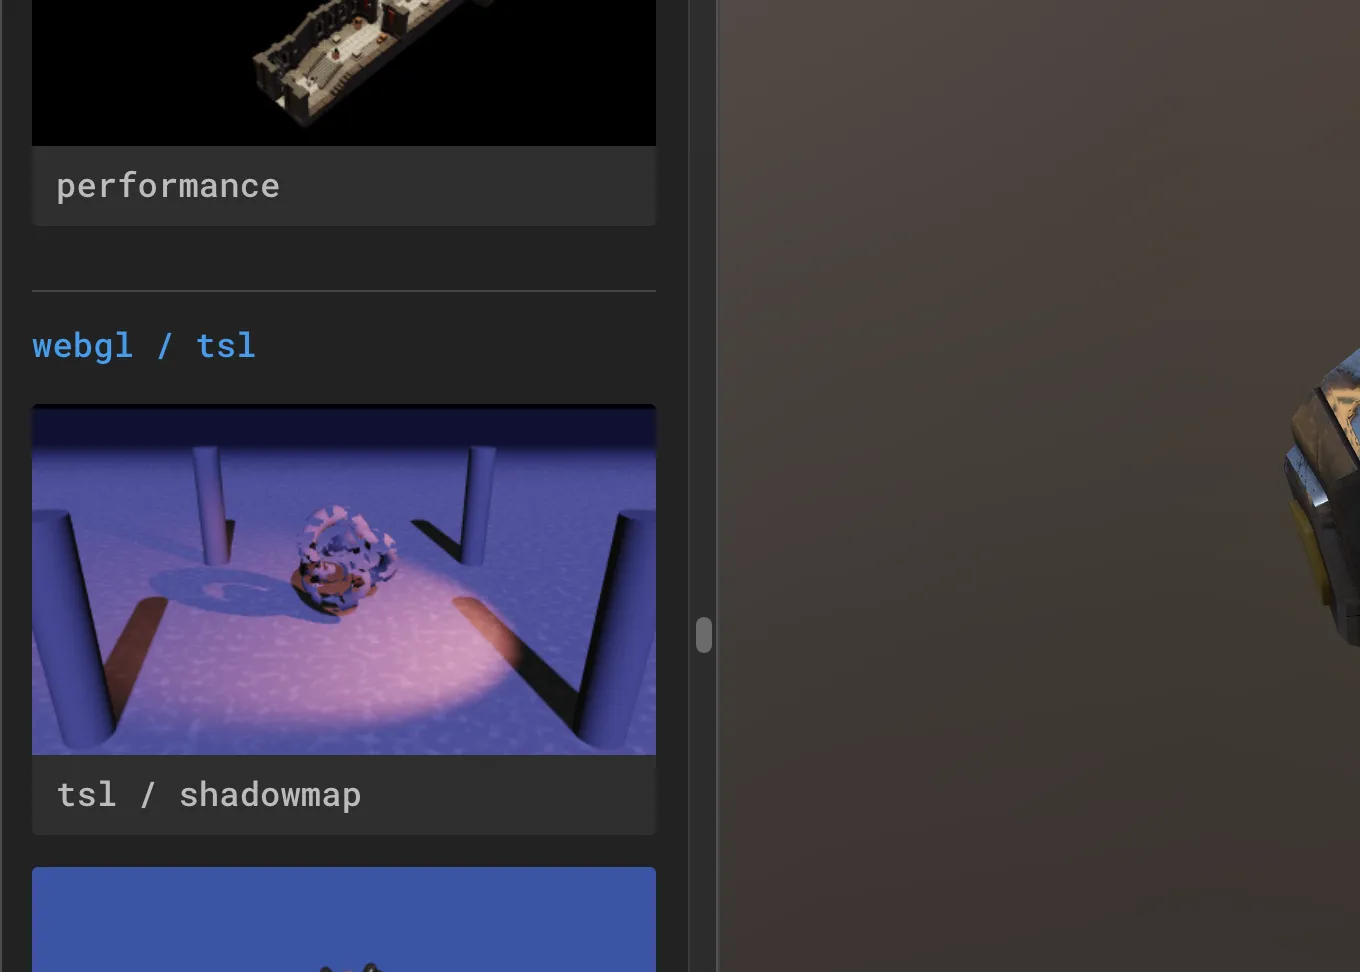
There are so many that it’s really hard to find something specific, especially since the search only considers the title of the examples, while almost every example demonstrates multiple techniques at once. This is why I usually use the GitHub repository’s search instead, look for whatever term I’m interested in, and target the examples in which that term appears.
Setup 31:51
Enough theory, it’s time to code.
We’ll start with a setup taken from the original course and convert it to the new version of Three.js with WebGPU and TSL. It’s also a good way to discover some new features that came with recent versions of Three.js.
I’m assuming that you have Node.js installed on your computer, and the command line tool available. If you’re not sure, open your Terminal and type node -v. If you see an error message, you must install Node.js: https://nodejs.org/en/download. If you see the node version, you’re good to go, unless the version is too old, which you’ll know in a minute. I’ll keep the lessons dependencies up to date so that it runs best with the current LTS version of Node.js.
I’ll be using npm since it ships with Node.js and remains the most common choice, but you can use another package manager if you prefer, like pnpm or Bun.
Unzip the starter file, open the folder in your Terminal, and run npm install followed by npm run dev:
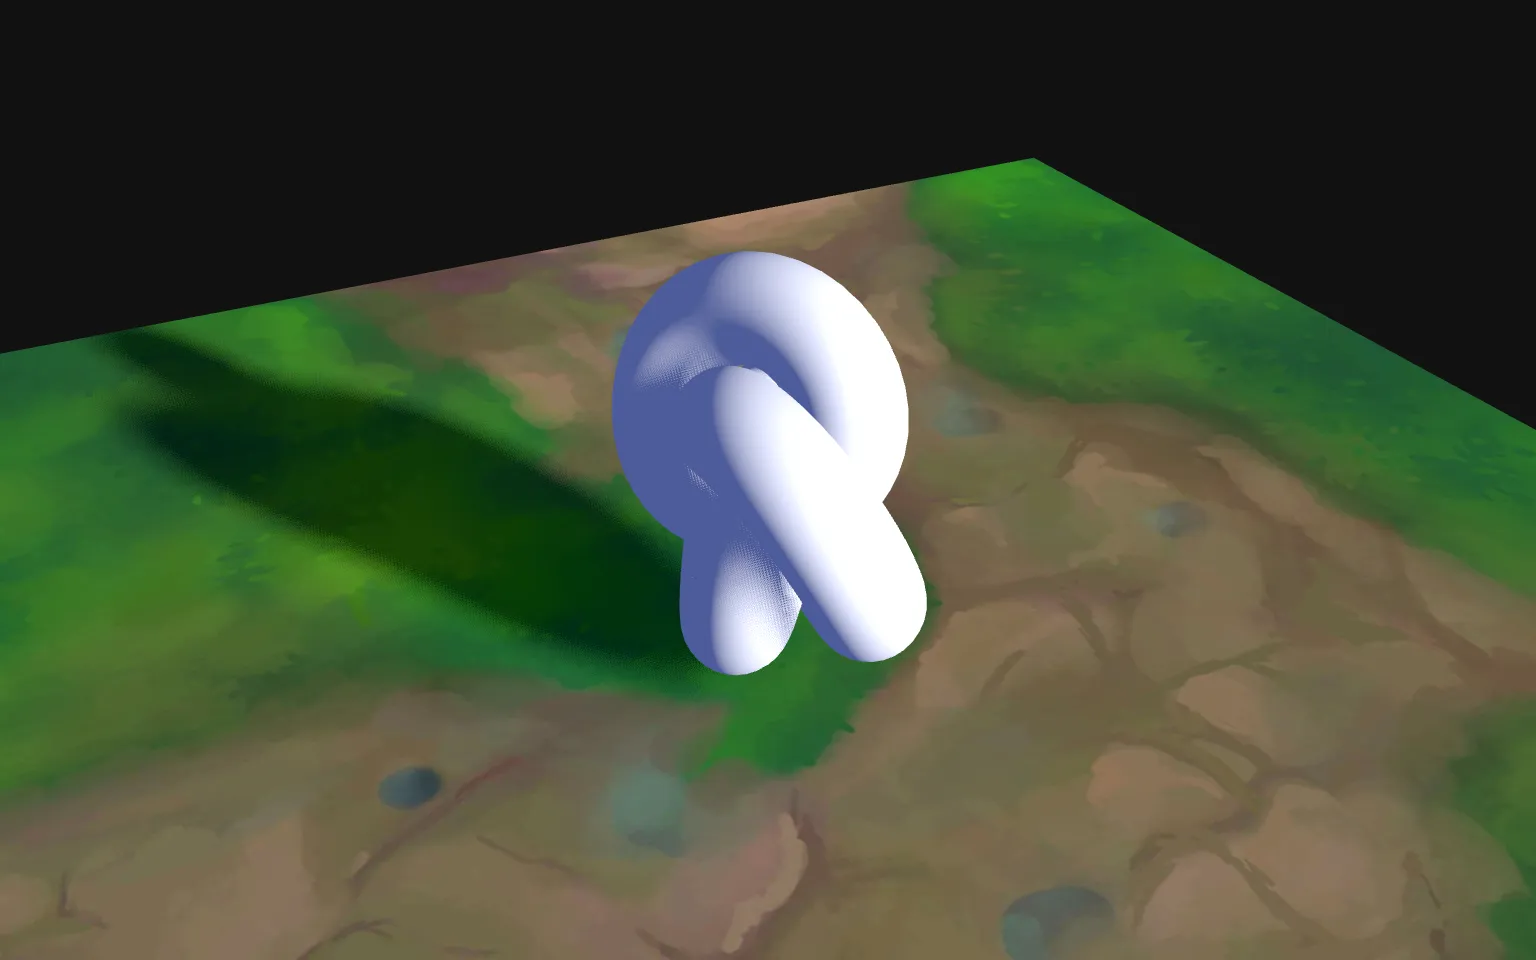
The website should open in your default browser. If it doesn’t, use one of the links display in the Terminal. And if anything goes wrong, join the Discord server and we will help you out.
We have a torus knot in the middle of the scene, with a nice painted floor.
I lied when I said the setup is taken from the previous lessons, because I’ve already applied two changes.
Shadows
The renderer shadow map is set to use the PCFShadowMap which has been added recently:
renderer.shadowMap.enabled = true
renderer.shadowMap.type = THREE.PCFShadowMap
This solution looks a lot better, with a different approach to blur the shadow map.
You can control the blurriness on the directionalLight with the radius property.
Try with a radius to 10:
directionalLight.shadow.radius = 10If you push the radius too high, you might start to notice some noisy artifacts, but it’s a lot less disturbing than the PCFSoftShadowMap that we usually use. And the blur algorithm creates some kind of visual noise, which gives a little bit of “texture” to the surface. Anyway, it’s barely noticeable in this case because of the floor texture.
Timer
The second change is with the Timer:
const timer = new THREE.Timer()
timer.connect(document)

const tick = () =>
{
    timer.update()

    // ...
}
It’s a replacement for that good old Clock, and it fixes some bugs we had been dealing with for years, like calling getDelta() twice and getting a value to 0.
We can access the delta time and elapsed time using getDelta() and getElapsed(), but we don’t need those right now.
We can also connect the Timer instance to the document using connect(document) so that the instance is aware of page visibility, and avoid huge delta time because the page was hidden for a while.
Canvas
Now onto the changes we’re doing together to run WebGPU and use TSL.
The first one is kind of silly, but the class we put on the <canvas> is webgl. Even though it’s not really important, if you’re like me, you need to fix it.
In the index.html, change the webgl class to threejs:
<canvas class="threejs"></canvas>In script.js, apply the same change in the querySelector():
const canvas = document.querySelector('canvas.threejs')In style.css change the selector to .threejs:
.threejs
{
    position: fixed;
    top: 0;
    left: 0;
    outline: none;
}
Import
Since Three.js will keep supporting the old version, they created a separate build for the new one.
All we need to do to use that new build is to import the Three.js dependencies from 'three/webgpu' instead of 'three':
import * as THREE from 'three/webgpu'☝️
At this stage, the page is broken.
Be very careful not to mix 'three/webgpu' and 'three' in the same project. This might result in bugs and bigger build files.
As for three/addons, which we will use a few times throughout this course, it’s fine. Both builds share the same core since version 167 of Three.js.
Renderer
Right now, the script is broken because we try to instantiate the WebGLRenderer, which doesn’t exist in this build.
You guessed it, we need to instantiate THREE.WebGPURenderer() instead:
const renderer = new THREE.WebGPURenderer({
    canvas: canvas,
    antialias: true
})
Unfortunately, it’s still not working.
Animation loop
If you check the Console, you’ll find an error looking like Uncaught Error: THREE.Renderer: .render() called before the backend is initialized. Use "await renderer.init();" before rendering.
It’s because we are trying to render the scene, even though the backend is not ready yet. But what even is the backend?
This is one of Three.js’s structural changes.
What we call the “renderer” is now the developer interface that we can use to render the scene, change the size, set a clear color, etc. And the “backend” is a lower-level class talking to the GPU and following the instructions we provide to the renderer.
There are currently two backends: one for WebGPU, and one for WebGL. If the user supports WebGPU, it’ll run this one by default. Otherwise, it’ll fall back to the WebGL backend, which we can also force, but that’s for the next lesson.
Initializing the backend takes a little bit of time, and we cannot render the scene until it’s ready.
There are two main solutions to prevent a render before the backend is ready.
- We can ask the renderer to initialize itself and wait for it to be ready using promises.
- We can change our animation loop to synchronize itself with Three.js’s own animation loop.
Because yes, the renderer now handles its own animation loop, and it won’t trigger any call until its backend is ready.
Let’s go for the renderer animation loop, but we will get to use the first technique later in the lessons.
This means that, first, we need to stop our own animation loop.
In the Animate section, remove the requestAnimationFrame() and the initial call to tick:
const tick = () =>
{
    timer.update()

    // Update controls
    controls.update()

    // Render
    renderer.render(scene, camera)

    // // Call tick again on the next frame
    // window.requestAnimationFrame(tick) <- Remove
}

// tick() <- Remove
And after the tick function, call setAnimationLoop() on the renderer, and provide the tick function as an argument (without calling it):
const tick = () =>
{
    timer.update()

    // Update controls
    controls.update()

    // Render
    renderer.render(scene, camera)
}

renderer.setAnimationLoop(tick)
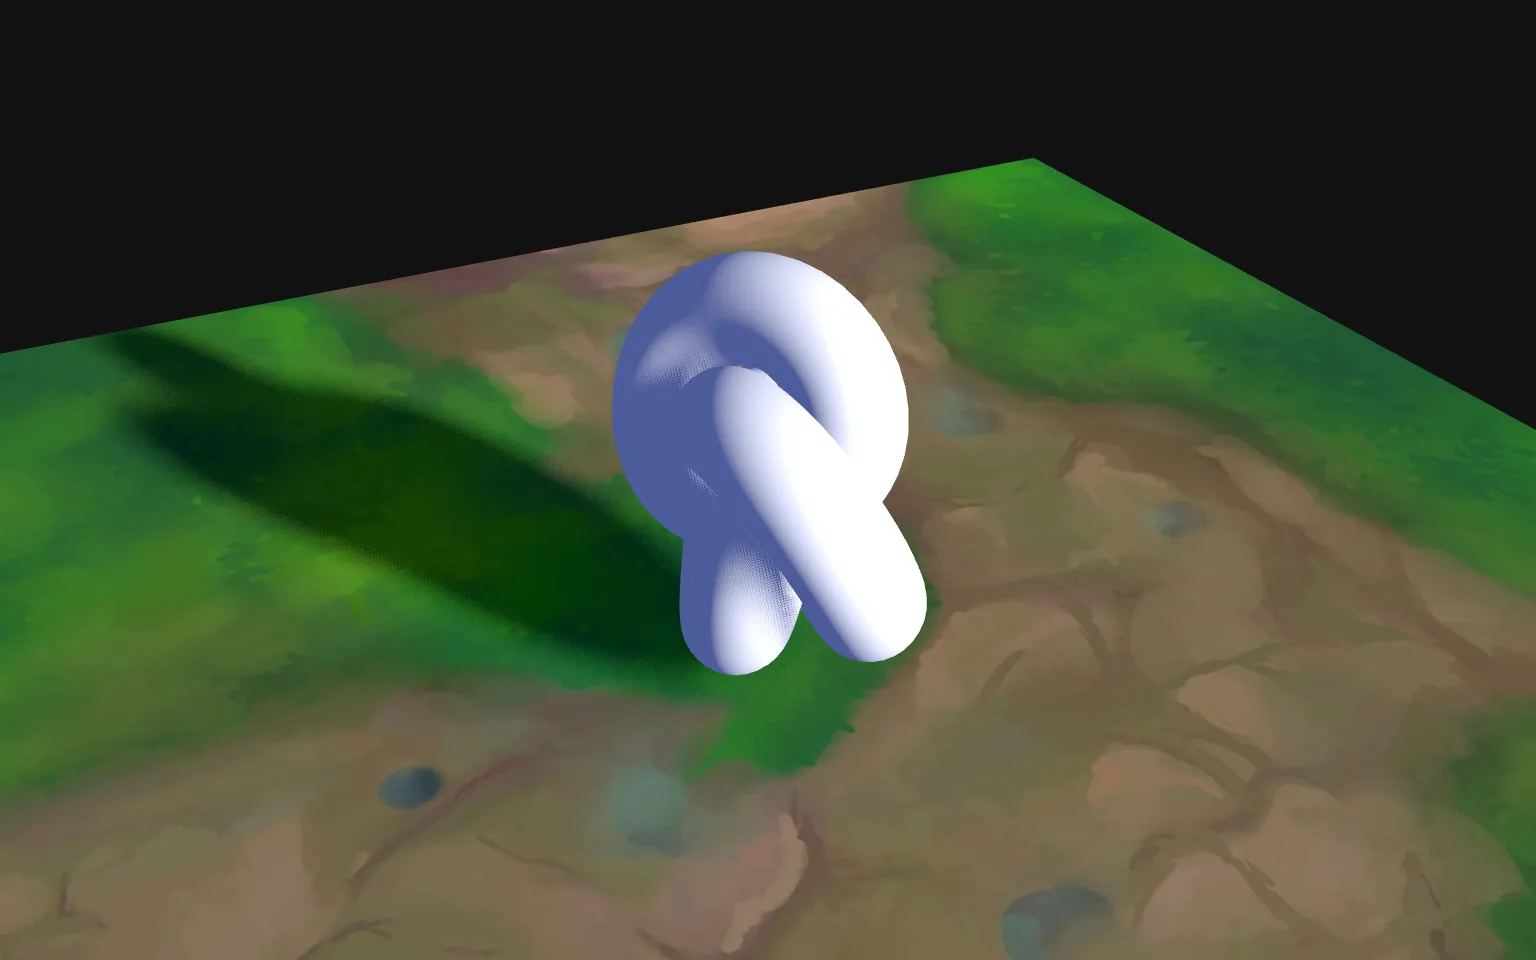
We get our render back, and everything is working like before.
The renderer instance will handle its own requestAnimationFrame loop, and will call the tick function we provided on each frame.
Let’s make sure that the WebGPU backend is running. In the next lesson, we’ll use some cool debug tools, but for now, we can just do a console.log() of the renderer.backend:
console.log(renderer.backend)If you see WebGPUBackend, you’re good to go.
If you see WebGLBackend, it looks like your setup doesn’t support WebGPU. Even though most of the lessons will work thanks to various fallbacks, we will use WebGPU-only features near the end of the course. Also expect weaker performance.
If you were expecting WebGPU to work, don’t hesitate to share the problem on the Discord server, and we will try to help you out.
Secure context only 43:12
Before I leave you, there is an important restriction regarding WebGPU that you should know about.
You can use the WebGPU API only over a secure context. Running the website locally is considered a secure context, but if you want to put your project live, or access it over the network from a different device such as your smartphone, you’re going to need an SSL certificate.
If you don’t, the WebGL backend will be used as a fallback, which might result in a performance downgrade, or even a crash if you use WebGPU-only features.
Every decent hosting solution supports SSL, sets it up automatically, or can help you do it, so I’m not worried about you putting the website live. But in case you want to run the project locally and test it on other devices over the network, I’d rather give you a hint.
To keep things simple, we’ll do it in this lesson only. The following lessons won’t have the SSL certificate, but you can follow these instructions if you want.
And to add an SSL certificate, since we are using Vite, we can use the @vitejs/plugin-basic-ssl plugin.
In the terminal, run npm install @vitejs/plugin-basic-ssl.
In the vite.config.js file, import basicSsl from '@vitejs/plugin-basic-ssl':
import basicSsl from '@vitejs/plugin-basic-ssl'And call it in the plugins array:
export default {
    // ...
    plugins:
    [
        // SSL
        basicSsl(),

        // ...
    ],
}
Start the Vite server again with npm run dev, and your project now runs with an untrusted certificate.
⚠️
Don’t forget to write https:// instead of http:// in the URL.
This means that your browser will very likely warn you about this bad certificate, but you can choose to proceed and visit the page anyway. The WebGPU API is then available.
In the next lesson, we’ll learn how to debug the project and use tools that make it a lot easier to test which backend is running.
Conclusion 47:40
As you can see, everything looks just the same, and most of Three.js’s features have been perfectly ported to this new version.
But now, we can have some fun with TSL, which we do in the next lesson.
How to use it 🤔
- Download the Starter pack or Final project
- Unzip it
- Open your terminal and go to the unzip folder
-
Run
npm installto install dependencies
(if your terminal warns you about vulnerabilities, ignore it) -
Run
npm run devto launch the local server
(project should open on your default browser automatically) - Start coding
- The JS is located in src/script.js
- The HTML is located in src/index.html
- The CSS is located in src/style.css