SPACEto play / pauseARROW RIGHTorLto go forwardARROW LEFTorJto go backwardARROW UPto increase volumeARROW DOWNto decrease volumeFto toggle fullscreenMto toggle mute0 to 9to go to the corresponding part of the videoSHIFT+,to decrease playback speedSHIFT+.or;to increase playback speed
Shortcuts ⌨️
Unlock content 🔓
To get access to 93 hours of video, a members-only Discord server, subtitles, lesson resources, future updates and much more join us for only $95!
Want to learn more? 👋
That's the end of the free part of this lesson
WebGPU & TSL Course
new
$45
VAT incl.
- 21 lessons · 24 hours of video
- Quizzes · Certificate
- Members-only Discord server · Future updates
Introduction 00:00
In this lesson, we are going to build an energy shield. Its surface is made of animated hexagons, and we can trigger impacts on that sphere, making the hexagons react.
This is quite a difficult lesson with advanced tricks, and we’ll use object-oriented programming so that anyone can use our shield easily in their Three.js project.
Setup 00:47
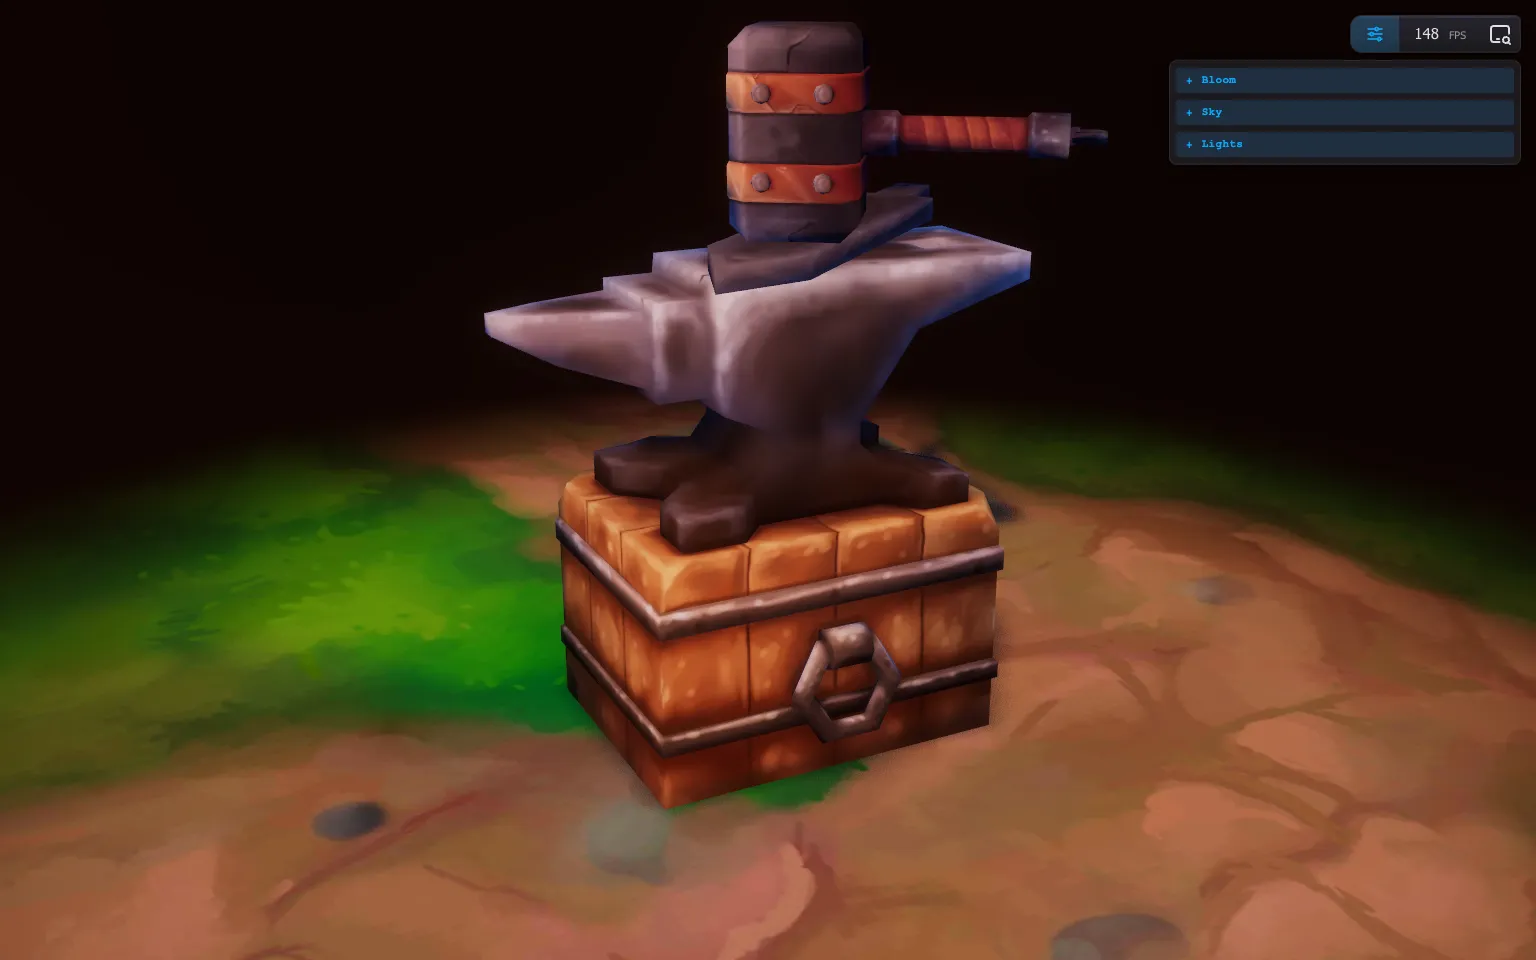
The starter already contains the following:
- The same floor we used in previous lessons
- A model composed of an anvil and a hammer. You’ll see why it’s important later.
- Some lighting with shadows
OrbitControlsto rotate around- A
SkyMeshto have something to look at in the background - It’s all being rendered with the
WebGPURendererbut with some post processing already happening, more precisely the bloom pass with a threshold at0(meaning that everything but pure black is bloom), but a low strength - An instance of the
Inspector - There is also a hexagonal texture in the
static/folder. More about that in due time.
Shield class 01:59
As mentioned earlier, we’ll organize our shield in a JavaScript class so that it can be used and re-used more easily.
For this lesson, I expect you to already know the basics of classes in JavaScript, but also modules (export / import) which you can learn in the Code Structuring for Bigger Projects lesson from the original course.
Nothing too complex, don’t worry.
In src/ create a Shield.js file and export, by default, a basic Shield class:
export default class Shield
{
    constructor()
    {
        console.log('Shield instantiated')
    }
}
In script.js import the class:
import Shield from './Shield.js'And, after the Post Processing section, create a Shield section, instantiate the Shield, and assign it to a shield variable:
/**
 * Post Processing
 */
// ...

/**
 * Shield
 */
// Instance
const shield = new Shield()
Check the Console to make sure that you get the Shield instantiated in the logs.
Geometry, material and mesh 04:09
Let’s create the geometry, the material and the mesh in separate methods, just to keep things well compartmented:
export default class Shield
{
    constructor()
    {
        this.setGeometry()
        this.setMaterial()
        this.setMesh()
    }

    setGeometry()
    {

    }

    setMaterial()
    {

    }

    setMesh()
    {

    }
}
☝
Having a different method for each one is a little bit overkill, but they’ll get slightly complex, and fragmenting the code improves readability.
We can now import THREE from 'three/webgpu', instantiate everything, and save it in the context:
- For geometry, simple
SphereGeometry - For material, simple
MeshBasicNodeMaterialbecause we’ll use TSL nodes - For mesh, use the geometry and material
import * as THREE from 'three/webgpu'

export default class Shield
{
    // ...

    setGeometry()
    {
        this.geometry = new THREE.SphereGeometry(1, 32, 32)
    }

    setMaterial()
    {
        this.material = new THREE.MeshBasicNodeMaterial()
    }

    setMesh()
    {
        this.mesh = new THREE.Mesh(this.geometry, this.material)
    }
}
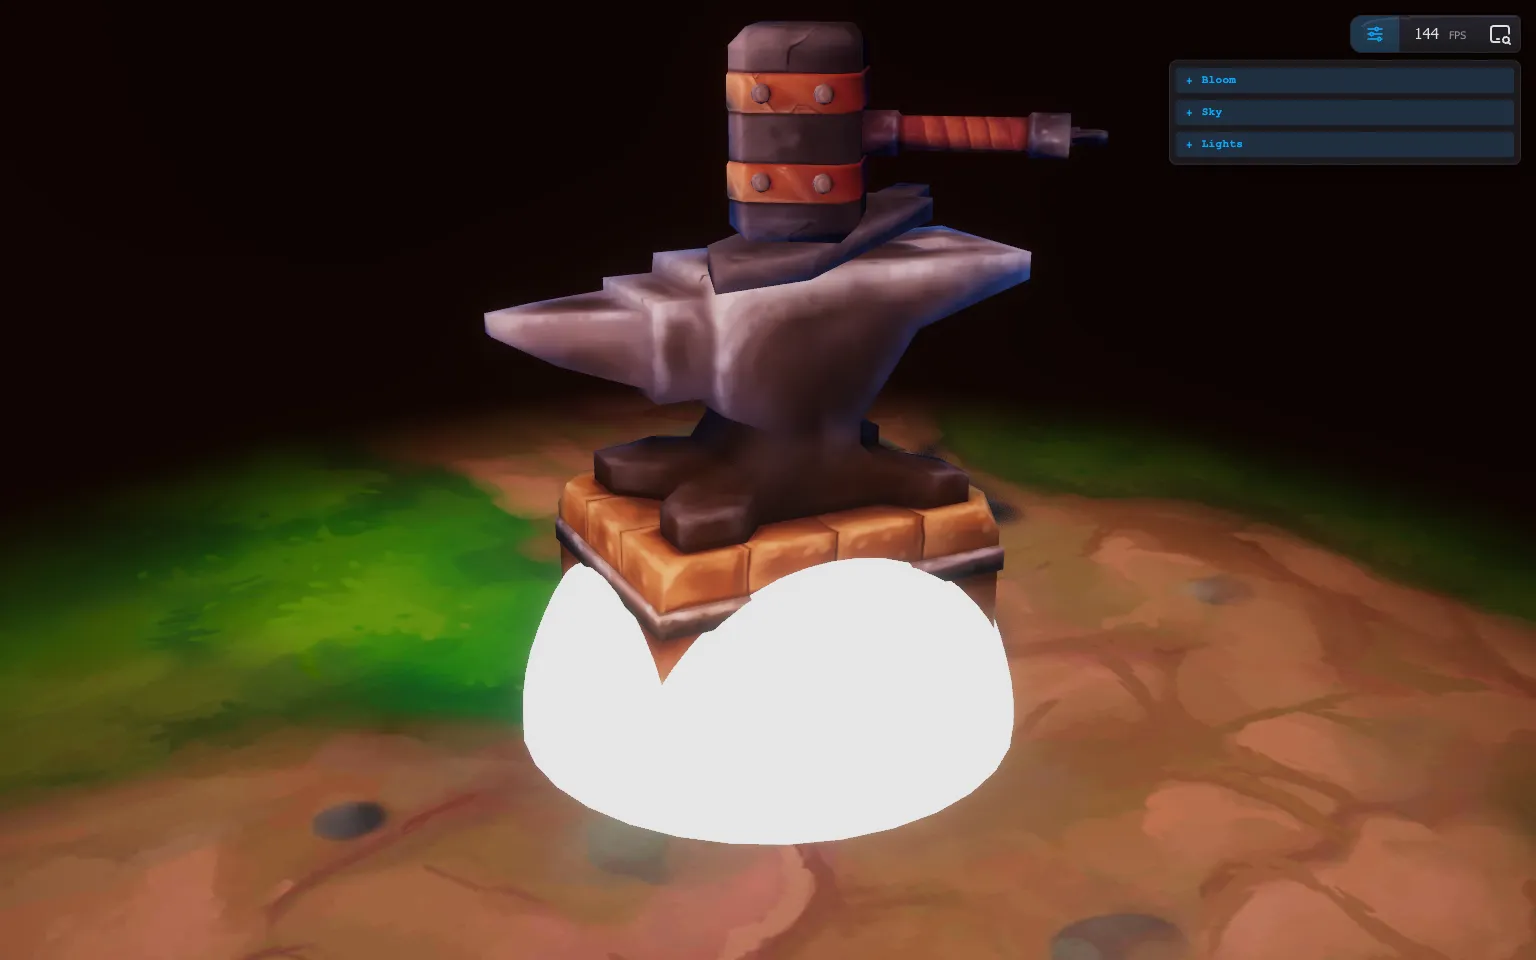
We instantiated a Mesh but didn’t add it to the scene yet, first because we don’t have access to the scene in the Shield, secondly, because we can’t assume where to add() the shield. Remember that we are programming the shield to be used by other developers, and we don’t know in what group they will want to add it.
Still, we need that shield somewhere in the scene, and there are two main options:
- We send the parent we want as a parameter of
Shield - We let the developer add it himself from the
meshavailable in the context
We’ll go for the second option, which is the simplest and more logical.
In script.js, add the shield.mesh to the scene:
const shield = new Shield()
scene.add(shield.mesh)
☝
A third option consists of making our Shield class inherit from Object3D, and adding the whole instance to the scene. This technique also implies some changes in our current code, and I personally don’t like it because we would be forced to follow specific patterns. Regardless, it’s a viable solution.
Radius 09:36
We’ll add our very first parameter to the Shield class, and it’ll control the radius.
How to use it 🤔
- Download the Starter pack or Final project
- Unzip it
- Open your terminal and go to the unzip folder
-
Run
npm installto install dependencies
(if your terminal warns you about vulnerabilities, ignore it) -
Run
npm run devto launch the local server
(project should open on your default browser automatically) - Start coding
- The JS is located in src/script.js
- The HTML is located in src/index.html
- The CSS is located in src/style.css